Friday, December 28, 2012

How my new Continuous Ink System turned into a snowy day scene.

Santa was good to me this year! Aside from a new Kindle, he brought me a continuous ink system for my wide format printer. Now you might ask what is a continuous ink system so to answer that I am going to direct you to company(CISInk) he got the system from. They can explain it better than me and in far fewer words.

 Needless to say not long ago I had bought new single use cartridges for my printer and at over $100 bucks for the set I was not going to toss them out until I can empty most of them. You see you can't mix the two delivery systems- so either I toss the single use out and hook up the continuous or I wait to hook up the continuous after I use most of the ink in the single use cartridges. To help use up the ink I downloaded a lot of digital paper from Jessica Sprague.com and am in the process of "printing" away the single use cartridges so that I can hook up the continuous system.

One of the papers I printed is from Echo Park "Winter Park Collection (Pack 2)" called Park City. I picked that particular paper for two reason- 1. it just looked so wintry , 2. it had a lot of different colors that would use the ink up evenly. The down side was I really couldn't find a project I wanted to use the paper on- so I added it to my have on hand stack.

Now the other day when that awful storm was making it way east , were I live in Virginia only got cold and rain. So what do I do on a really cold and rainy day- I cut paper of course! I was playing with the Everyday Winter Card Kit that SVGcuts released a week or two ago and in it is a shaker card. I'm not going into details as to what a shaker card is since many descriptions and details can be found on the Internet and counting the wonderful instructions and video SVGcuts does for their kits.

Well to shorten the story even more...Back in the fall, Bridgit Mann did a wonderful Window Pane project using various pieces and parts of kits from SVGcuts. I had made a fall version as well that I now have hanging the my coat closet. I happen to notice the frame when I was digging around in the closet and a bolt of lighting hit me- A shaker frame- using that Echo Park Paper I had printed a few days ago. So without further torture here is the end result of combining shaker technology along with 3d creativity and wonderful files that lend themself to any number of things.


Files used:                                                                   Paper Used:
Winter Bliss                                                                Echo Park- Winter Park Collection (pack2)
Snowflakes Mini Pack                                                Cosmo Cricket Half Way Cafe
Fall Wall hanging by Bridgit Mann

Friday, November 23, 2012

Hello Dolly

 
For the Christmas Challenge sponsored by SVGCuts.com I decided to make a doll.Though I call her Dolly, if you look real close she looks like Kitty Russell from Gun Smoke.

The kits used are:


Dress-
  • The Skirt is the Christmas Tree Ornament (Christmas Ornament Kit ) sized to 11X11 with the various branch layers sized to fit the tree.
  • The bodice of the dress is the Nutcracker's head and arms (Clara’s Christmas Eve) cut to the kit size.
  • The dress yoke is the Nutcracker hat top- enlarged to 2.5X2.5 grouped with a circle from the shape library sized 1.25X1.25.

Head and Hat-
  • Head - The Spindle Ornament (Christmas Ornaments) cut to size. I then cut the spindle along the first joint from the bottom, turned it end over end and inserted the pointed end  into the top of the spindle. - imagine a tree topper- if that sounded confusing.  
  • Hat and Parasol - the Hat is  2 sets of the rosette  found in  the Dolly Snowflake Ornament (Christmas Ornaments).  I glued three of the rosette strips together -formed the rosette then hot glued it onto the hexagon used for the top of the Nutcracker' s hat (Clara's Christmas Eve). For the parasol I used the forth strip-  folded along the lines- tied it with a ribbon and added a handle.
Her hair is two different twines cut to length, blended then hot glued to the head.

Sunday, September 30, 2012

It feels good to help out!


SVG CUTS's newest kit, Gimme Candy Boxes SVG Kit, has had me cut'n and a glu'n since I bought it Friday.


I have made a few in the traditional Halloween theme boxes but for the most part I have been making them out of paper from the mambi pack by "me & my Big ideas" I bought at Michael's and AC Moore. My good friend Carol Landers is holding a fund raiser for Breast Cancer Awareness October 6th during the homecoming activities for the  Sandston Jets Football Association.

Below is a small sample of how the boxes look in Pink and I would have posted more but they have already been delivered to Carol for filling with an assortment of candy. Hopefully you can get an idea of versatile these boxes are.


The last fund raiser Carol hosted she used gift bags I made from Betty's Bags and Boxes II SVG Collection and the mambi paper to dress up her cookie baggies and requested more if possible for this fund raiser. The cookies in the gift bags went fast!

To add a little variety I also cut out a few of the lacy cubes from the One-Piece Boxes SVG Kit that I modified using the free file Awareness Ribbon and added a LED tea light for her table decoration.

I've already bought two more mambi packs to have on hand to make as time permits for her next fund raiser.

Remember Ladies- get your Mammogram if you have not already done so!

Wednesday, September 26, 2012

Halloween Challenge Entry

 
SVG Cuts is having a Halloween Challenge.The idea is to make a Halloween project  using only files from selected kits. The kits are:
  • Elmhurst Hollow SVG Kit
  • Midnight Jamboree SVG Kit
  • Party on Elm Street SVG Kit
  • Spooky Silhouettes SVG Collection
  • Hazel's Wicked Witch Crafts SVG Collection
  • Gotchic Flourishes SVG Collection

  • My entry for the challenge is a glass block that holds a silhouette that I created. After cutting out the welded piece I inserted the silhouette into the block along with a printed piece of vellum and some clear lights.
    This was a fun project because I actually got the weld feature to work right and I got the vellum and silhouette into the block without dropping it! I know I will be making more blocks in the future.

    The elements used to make the silhouette are:
     Hazel's Wicked Witch Crafts SVG Collection - Tree and Window frame
    Midnight Jamboree SVG Kit - Moon ,Witch 1, and Happy Cat
    Spooky Silhouettes SVG Collection - Fence, Witch 2 and Haunted House
    Elmhurst Hollow SVG Kit - Bats

    The pattern on the Vellum is from Cosmo Cricket Digital Paper Pack - Matilda - Black Brew.


    Fall's Window

    Fall is in the air! I love the fall season probably more than any of the others. Crisp air, vibrant colors and MUMS. I love MUMS.

    The Fall Window Wall Hanging by Brigit Mann on SVG CUTS.com was the inspiration for this wall hanging that I am going to add to my office. Charlotte's Web by E.B.White was the inspiration for the the welcome sign. Various pieces and parts I made just because they are so cute and easy make up the rest of the window's decorations.

    For my version of Bridgit's project I used the following SVG files on various papers that I have in my stash.

    Sunday, September 23, 2012

    I love Halloween!

    I just finished a project for Halloween that I think will be really neat once I get all my stuff out. I only wished the pictures were better cause it turned out really cute and I figure one of my grandsons will walk off with it once they see it.


     I used the cauldron found in the Party On Elm Street SVG Kit from SVG Cuts to give the witches from the Lemax Halloween collection a little place of its own.

    To add a little light on the decoration I cut out a circle and poked a string of Halloween lights through it here and there, to mute the lights I cut another circle out of frosted vellum. I think it gives it a smoky hue.

    Saturday, September 22, 2012

    Well I did call this site Eclectic. For the past week I have been absorbed into a series of books by Mark Tufo called Zombie Fallout. Yeah I know Zombies. But in all honesty I started reading the first book cause I was bored and it was .99 at Barnes and Nobles-  Nook Books.

    Well what started out as "what the heck" reading turned into a marathon. I just finished book 5 and was hoping there is a book 6. Well there will be October 1st. But I was happy to also see while I looking online was the the TV and movie rights had been bought. OK. I never did get into the Living Dead series nor the one Noah Willey plays in but I think (if done right) I could get into Mike Talbot  and company on the screen. Well off to see if I can find another "why not" book. Happy Reading folks.

    Saturday, September 1, 2012

    An Apple a day!

    Sometimes crafting makes me sad like when I make a file that was created by a very talened artisit but the artist is no longer creating. This is the case of my little apple basket. The file was designed by Jessica Bashaw. Jessica decided to take a creative break a few months ago but you can still purchase her files from Designs on Cloud 9. This file is from the Fall Harvest Favor Box collection. Very quick and easy- it makes the perfect table decoration or Thank You gift.
    Jessica if you are still out there - thanks ! and Designs on Cloud 9 tahnks for keeping her files available.

    Thursday, August 30, 2012

    Mirro, Mirror on the wall & Miss Baker's Apple

    I know the picture does not show how awesome this is in the dark, but it is super easy to do and is a really great affect element.  Ever since the Miss Baker's Classroom SVG Kit by SVGCUTS came out, I have been eyeballing that 3D Apple and thinking "Mirror, Mirror -on the wall."
    I found a picture of the Witch from Snow White by doing a google search and then printed on Vellum For the mirror frame I used Jackie's Frame- a free SVG file. I doubled the frame back for strength and added two strips of card stock shaped like an upside down  "T" to back for a stand.  By taping the LED tea light onto the stand where it would be directly behind the face it back lights just perfect for a scary glow.
    The apple is done in a blood red and sits at the base of the frame.  Sure hope Snow White isn't hungry.

    Monday, August 27, 2012

    BOO!

    To say I like to do paper crafts is an understatement. It is my R-n-R. my therapy and my escape. When I saw the newest kit from SVGCUTS , I could not wait to get home from vacation so that I could buy it and start cutting.
    So we leave our vacation spot in Florida abt 5:30AM on Saturday and by 9:00PM I'm home in  Virginia downloading the Midnight Jamboree SVG Kit .

    I know ...Sick isn't it! BUT I loved the elements of this the kit the minute I saw it. So far this is what I have created from this kit. So quick and easy!


    I have mentioned on several of my FB post that I collect Halloween items and give them to my grand kids. Well  some of the Halloween decorations I recently made using the SVGCUT files just might have to stay with grandma. I love the basket I made using the Fall Harvest SVG Kit  and Halloween themed paper as well as the Pie I made using blood red paper for the filling and spider web designed paper for the pie dish. I might have to craft a few spiders to go in it just to add some creepiness.
     

    I also made the candy corn container found in the Fall Harvest SVG Kit as well as a Goblin table decoration using the Haunted Hemlock Cards SVG Kit in black for the base and Jack-O-Lantern  in orange foil paper found in various kits such as Party On Elm Street SVG Kit and Salazar's Scary Squares SVG Collection.

     
    Of course my grandson BUCK (a.k.a- Denver R Oakley IV) has already claimed the corn and goblins as well as my haunted van that I made using the Ice Cream truck found in the  Ice Cream Birthday SVG Kit.

    So far no one has stole my haunted Ferris Wheel created using the Ferris Wheel file found in the Summer Street Carnival SVG Kit, but they have sure tried.

     
    Well it is time to get dinner- yes I still manage to fix my poor hubby dinner- gotta keep him happy so that he can support my habit!
     
    Happy crafting and who knows what will be created between now and October 31st - I feel ghostly possibilities every where! 


    Sunday, August 5, 2012

    This weekend has been a crafty one. I should have been cleaning house and getting ready for vacation but I just could not muster the energy needed to get out the vacuum and dust cloth so I did what any self respecting crafter does when feeling guilty about not doing house work - I re-arranged my craft  supplies.

    While shuffling paper around,  the new stack I bought - Autumn Melody by DCWV- caught my attention. One particular pattern ( brown with gold foil acorns) really stood out and was begging to be used. I had no idea what I was going to make out of it - but I knew that there would be something in my SVGcut files- all I had to do was go to my computer, open the files and look through the wonderful photos that come with each file when they are downloaded.

     I decided to try a  file called Oak Leaf Lantern in the Crisp Days of Fall Kit. Like so many of my files from SVG Cuts this was one I bought so that I could take advantage of their free gift offered each week.

    As with all of Mary's (the designer of the SVG files) files and kits, the lantern was easy to assemble- her tutorial  was wonderful and helped make quick work of making the lantern.

    I think the lantern turned out well and I can't wait to add a LED tea light to it to see how it glows in the evening.


    The little pumpkin beside the lantern is from the Pick a Pumpkin file. I have used this file in the past but never made the little Pumpkin. I think there will be more of those little guys around the house before the Fall season is over. 

    Friday, August 3, 2012

    As hot as it is what better way to cool off then to think Fall, Pumpkins and Leaves. The current challenge at SVGCuts.com is to make something related to fall using only elements included in any of three files:
    Pick a Pumpkin
    Harvest Hill Farm
    Harvest Country Home

    There is a score of wonderful entries already posted and more to come since the challenge doesn't end until August 26. I can't tell you how much paper I have cut up and tossed trying to come up with something for this challenge that is different. So many of the crafters on this site are so talented and creative that I was having a hard time trying to NOT duplicate some of their ideas and projects.

    I started out with the idea of doing a wall hanging for the challenge since I had visited Joann's (fabric store)  and saw some really cute hangings in their fall displays. Originally I thought to use the picture frame found in the Harvest Country Home file as the plague base but changed my mind once I saw the baking sheet. It was more solid and would be sturdier than the frame. I knew I wanted some kind of pumpkins, flowers and leaves as decorations and I knew I wanted to use golds, greens, orange and brown as my color scheme. So I started pulling paper together and looking at the various elements in the files to see which ones would work with the paper I selected.

    This picture shows some of the elements I cut out cause I really wasn't sure what I wanted from the huge selection in the files or how they would look withthe paper once I got them cut:

    Once I got some of them glued and laid out on the baking sheet it just didn't go together as I thought. My wall plague just didn't work for me. Once again I figured I would toss the project and start over. As I was folding the baking sheet in half so that it would fit into the recycle bin better it hit me. It wasn't firm enough to hang but is was flexible enough to wrap. HUMMM


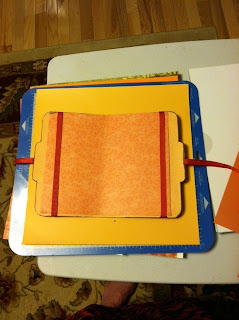
    I took a paperback book from the shelf and folded the baking sheet around it- It wrapped perfectly and was just the right size in width. It is a little longer than the average paperback but that is OK by me since I sometimes read large print books and they are a bit longer. I did find that it was just a little short for my NOOK but I can always make another later for the NOOK.

    I dug around into my ribbon stash and found enough of the right color to add straps on the inside that will hold the book into the cover and add ties so that the cover can be closed when not reading. I cut another baking sheet out and glued the two together so that the ribbon ends are not only hidden but secured as well. I had only one other problem to solve before my Autumn Book Cover was complete.

                                           
    I didn't like the colors I used from the pumpkin. Once I got all the layers glued together I thought they were flat and dull. So I dug through my stash of stuff and got out my Spectrum Noir pens and started coloring the colored paper.
    I used:
    OR1 to brighten the orange in the pumpkin
    EB5 to darken the brown on the vine
    BP6 to change a gold leaf to a pinky orange leaf
    BP2 to change a gold leaf to a reddish orange leaf.
    BG6 change the green shadow on the pumpkin to a brownish green &
    GB10 helped add depth to the other outlines on the pumpkin.


    Over all my wall plague that started as a baking sheet has turned out to be a very cute paperback book cover that will help make my coffee table decorative and festive throughout the fall season.


    Wednesday, July 11, 2012

    Ladybug Birthday

    My youngest grandchild turns 1 next week and we are having her first party Saturday. Her mom decided to do a Ladybug theme using hot pink and black so that we could recycle a lot of the stuff we bought for her baby shower just a little over a year ago.

    You could say I got carried away with this but it was fun! The plan is to use it as a table decoration after they get Grandma and Pawpaw's gift from inside.


    The printed paper was digital paper found at :
    MYGRAFICO
    The cut files :

    SVGCUTS.com


    Tuesday, May 8, 2012

    Two times in one week! WOW- getting to be a real Blogger here. On my last post I mentioned buying a Teresa Collins Stamp Making Machine and Spectrum Noir markers. Well they came in. The markers were an instant hit with me cause I love to color. I don't do it well but I love to color. I look forward to working with them.
    The stamp machine is not such a big hit...I think once I get the hang of it, it will be OK but it will sure eat up a lot of ink from my printer. Over all I think if I can find a stamp, I'll buy it verse make it. The machine will come in handy I guess for those type stamps you wished you had but do not exist. We will see.

    One of the things I like to do with my paper crafting is mix and match files and ideas. Most of the time the experiment is not successful but success is not the purpose..its the fun of doing it. Recently, I took two files that I got from SVGcuts.com- Breezy Backyard Lever cards and Iris Fold Cards and made a thank you card for my hubby. It is a Western theme and is a play on the song "You are My Sunshine". The paper I used was "the Naturals " from DCWV. I liked the paper so much I bought two pads of it and have used it on several "guy" projects.


    Well off to the land of "couch". My uptime has been long enough and its time to prop the old foot up and do a little reading. I am currently reading Alexander Ivy's latest Guardians of Eternity series - "Bound by Darkness". It is one of the many books I got to purchase with the B&N gift card I got from my wonderful co-workers as a get well soon gift. I would show you the Thank You card I made them but I sent it to them before I took a picture. Oh well...
    Have a great day and be at peace.

    Friday, May 4, 2012

    As you can tell I haven't been doing very well with keeping up on my Blog. Just seems to be so many things going on and of course never enough time.  Since my last post several things have happened.
    1. I had extensive surgery on my left foot that has set me back a bit. Not only did the surgery curtail my mobility it pretty much stopped my crafting for awhile.  
    2. I WON some wonderful stamps for Mother's Day and Father's Day made by ShabbyChic.com in a contest held by SVGATTIC.com.
    3. I bought some Spectrum Noir markers from ConsumerCrafts.com  so that I can color my new stamps that I won and the stamps that I am going to try and make using the Teresa Collins Stamp Making Kit I bought from Amazon.com. I'm waiting on delivery so when they come we will see what I can post.
    Being home with nothing to do but surf on an IPAD can be expensive! LOL

    I was able to make a few Cards while having my foot up with elements I cut out before surgery.

    My first attempt at stamping turned out OK. I used one of the Mother's Day stamps I won on a card made from the Welcome Spring File from SVGATTIC.com. I don't have anyone to send it to but it was fun making it and I got to play with my new stamps.


    I was also able to make a little note card I am sending to a friend of mine using the Tent Card file ,the Mad Tea Party file and the 3D Spring Flower File  also from SVGAttic.com. The sentiment is all my own! Coming up with corny sayings is fun and one reason I wanted the stamp making kit.

    Well I guess this enough babble for one day. Hopefully I can do better at blogging as my foot begins to heal.
    See Ya soon!

    Sunday, March 11, 2012

    Pictures of Files

    I finally finished printing all the PDF files for my SVG files and have gotten them into sheet protectors. I even have them organized into a binder using an Excel Spread Sheet I created. I wanted to make hyperlinks to the pictures included in most files but found that was a little tedious and my attention span wasn't up to that. I then tried to copy/paste the picture into the row of the file and that too was not a good thing. So I decided not to worry with the pictures. BUT
    I am a visual person. The pictures do more than inspire me, they help me chose paper and in some cases put the file together, so I wasn't satisfied with forgetting them.

    I collected all the SVG photos into a folder (search/copy/paste works wonders). Went through and printed the group pictures so that I could put them with the PDF files. BUT, that wasn't enough. Many of the files have individual pictures showing each element or card that is part of the total file. The individual pictures are truly inspiring, so I couldn't leave them out of the binder. Long story short...Picture Collages- I took all the smaller individual photos and using the create software that came with my HP printer I took all the non group pictures and made colleges. Now all I have to do if figure out a way to ID the photo to the file...but that's for another day.
    Here is an example of the collage page I created.


    Thursday, March 8, 2012


    Welcome Spring Blog Hoppers! This is my first time participating in a "hop" and I am excited to see how all this works. As you probably can tell my blog is NEW and today is the first time it has been published for view.  I hope to fill it with many completed projects such as the bird house (shown below) that I made from the Welcome Spring Kit.


    One of the many things I enjoy is making 3D paper crafts. There are several sites I visit often to purchase SVG files that can be cut on my Sizzix Eclips than assembled to make really rather incrediable things. My latest project is a bird house using "The Welcome Spring" SVG file from SVGATTIC.Com and paper from the Lemon Flower collection by DCWV.

    I made the yellow bird using a file from Cannon Creative Park and the "Print to Cut" feature of the Eclips. The birdie turned out OK even though I lost some of the printed features of the bird and it took more time than what I expected.  I have been spoiled by files like the Welcome Spring file and hope to have many more files from SVGATTIC  in my arsenal for years to come.


    You should have reached my blog from Lorbysworld.blogspot.com and will be heading to  Tee-myspot.blogspot.com next.

     If you got here by mistake Welcome any way and I hope you will view all the next projects in the Hop. To start at the beginning go to  Svgattic.blogspot.com.